The device
Every port, button, and jack on a TŒRN unit — what it does, when you use it, and what to watch out for. Includes SD card setup (format, default content, SD tool).
Top-down overview
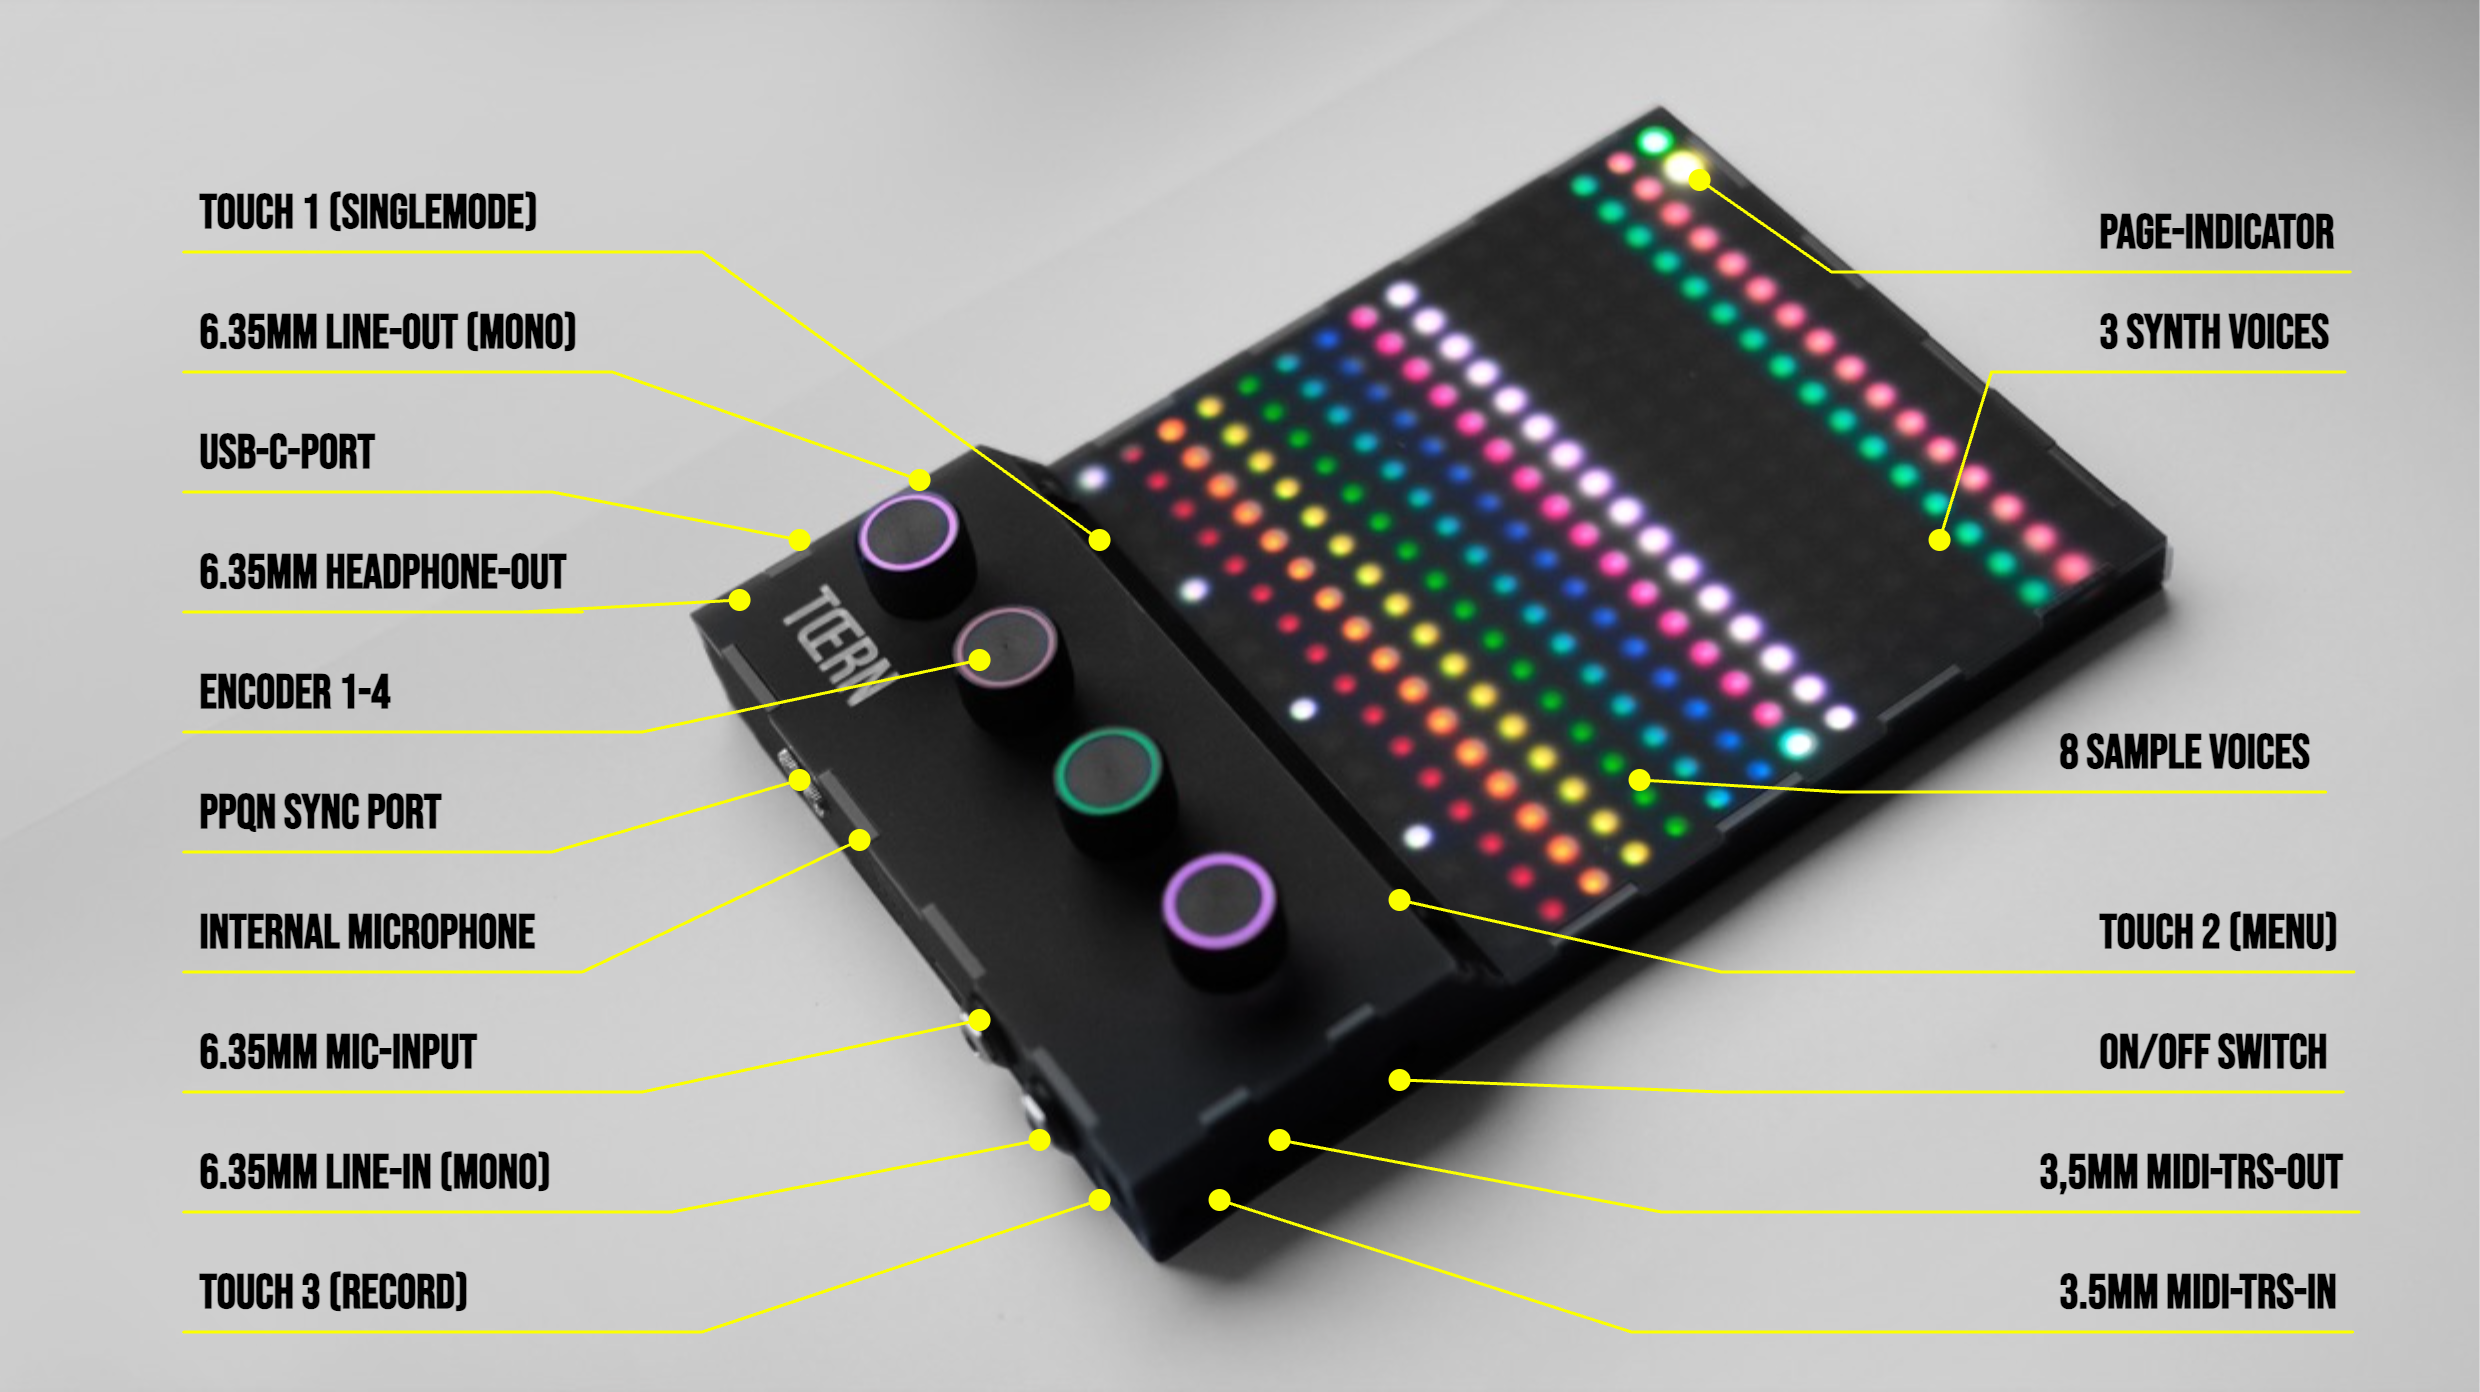
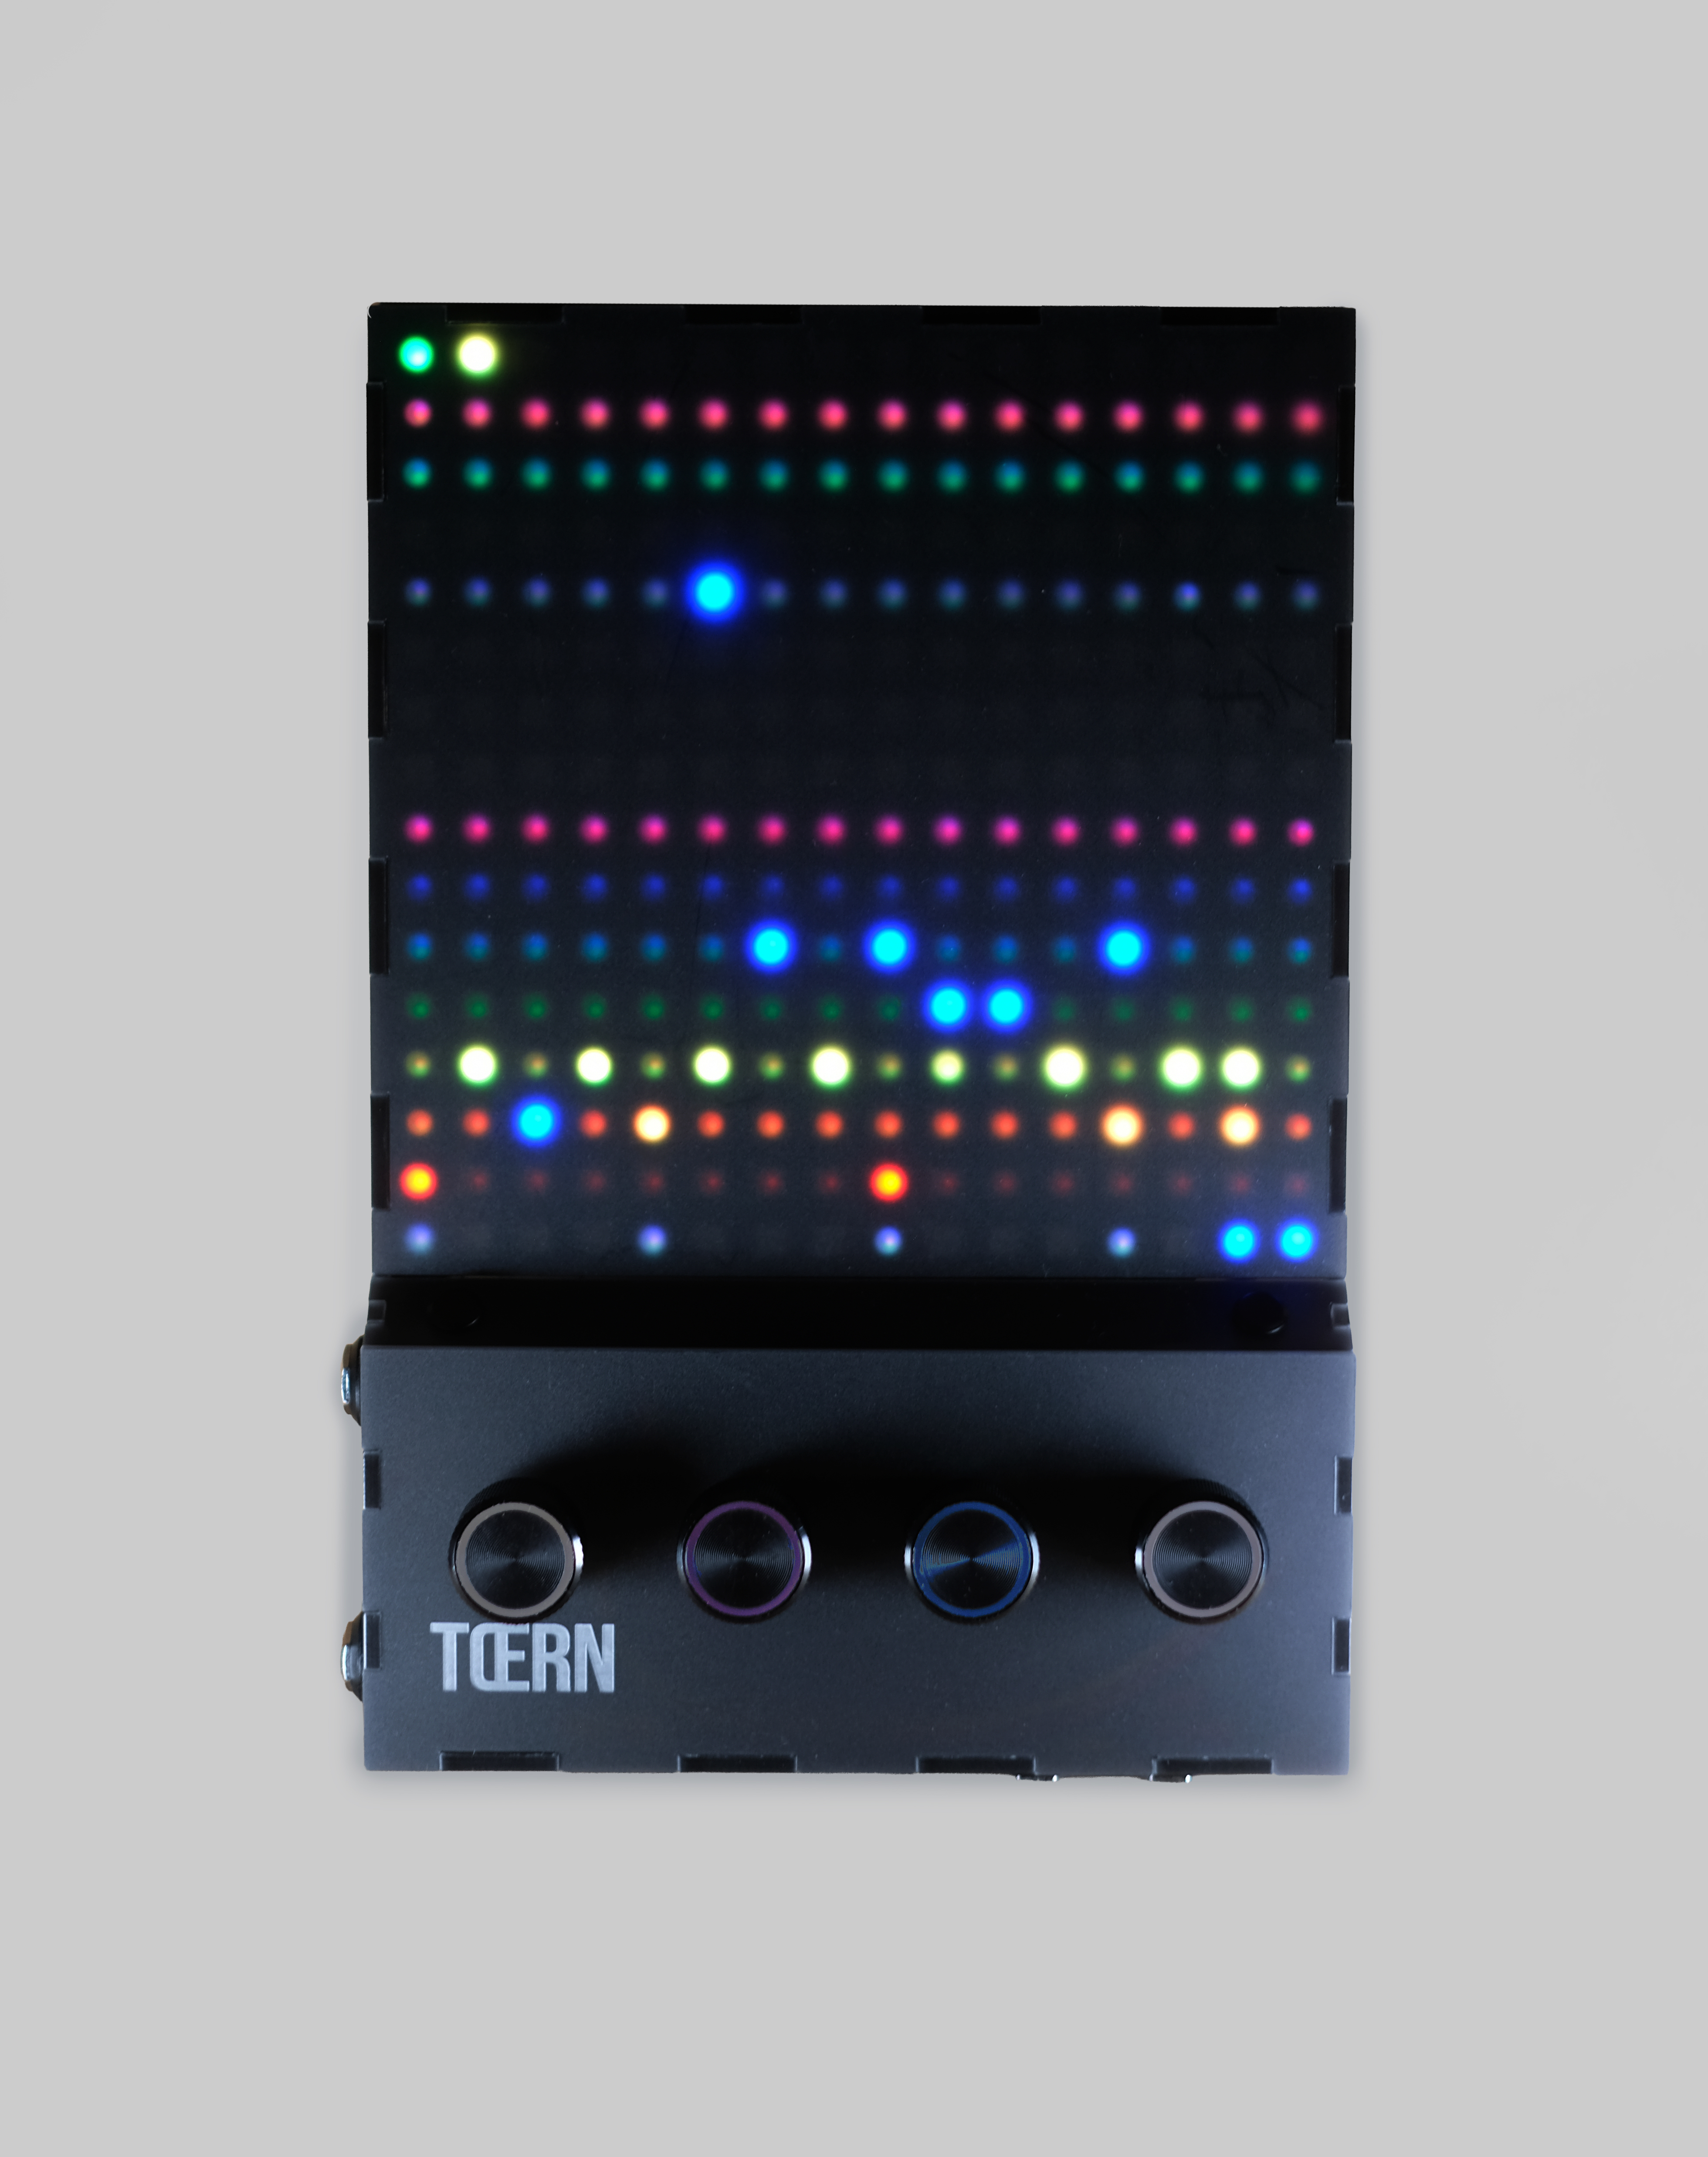
The face of TŒRN is dominated by the 16×16 RGB matrix. Four RGB-lit rotary encoders are evenly spaced across the width of the front strip below the matrix. Touch 1 (left) and touch 2 (right) are circular capacitive pads in the narrow band between the matrix and the encoders; touch 3 is another circular pad on the right bottom edge. Line out, USB-C, and headphone (A–C) and MIDI in, MIDI out, and power (D–F) sit on the lower left and right edges below the matrix — the diagram places those callouts just outside the chassis. Audio and recording jacks (G–J) run along the bottom edge; touch 3 (K) sits at the right end of that edge.
- A
- Line out — 6.35 mm stereo on the lower left edge (below the matrix). Send to a mixer or interface. Independent level under VOL → LOUT.
- B
- USB-C — lower left edge. Host data for firmware updates via the Teensy boot path; if a LiPo is installed, also charges that cell.
- C
- Headphone out — 6.35 mm (¼″) stereo TRS on the lower left edge. Use any phones or in-ears; level under VOL → MAIN.
- D
- MIDI in (TRS) — lower right edge, Type-A TRS. Standard MIDI from another device. See MIDI and Tempo (clock source).
- E
- MIDI out (TRS) — lower right edge, Type-A TRS. Clock + notes; pick what to emit under MIDI → SEND.
- F
- Power switch — physical slide on the lower right edge. Boots when slid on; the current pattern is autosaved before shutdown.
- G
- Internal mic — capsule on the bottom edge for hands-free sampling. Pick it as the active source under REC → INPT.
- H
- Micro SD slot — bottom edge, up to 64 GB. All samples, kits, patterns, songs and palettes live here. Push to seat, push again to eject. Only insert/eject with the unit off — the firmware re-indexes the card on boot. TŒRN does not mount the card as USB mass storage: prepare the initial layout with a card reader, or transfer files while the card stays in the unit via ETC → SD and sdtool.tyng.app (see SD card setup below).
- I
- Mic in (6.35 mm) — external microphone jack on the bottom edge, between the SD slot and the line-in. Sits next to the line-in so you can keep a vocal mic and a synth cable plugged in at the same time. Gain under REC → MIC.
- J
- Line in — 6.35 mm stereo on the bottom edge. Sample synths, drum machines or modular gear. Trim under REC → L-IN.
- K
- Touch 3 — third capacitive pad on the right bottom edge. Recording control: live/fast-rec from the grid and hold-to-enter record mode from the sample browser. See Controls → Touch pads.
Controls at a glance
Three input families are wired to the firmware:
- Four RGB-lit rotary encoders (1–4, left to right) on the front edge — each one turns, short-presses, and long-presses. Their function changes per screen. Row 1 of the matrix paints additional small hints just above the encoders.
- Three touch-sensitive pads — circular capacitive buttons: touch 1 (left) and touch 2 (right) in the strip between the matrix and the encoders, plus touch 3 on the right bottom edge. Touch 1 toggles single mode; touch 2 opens the menu; both pads together open filters or the sample browser; touch 3 is for recording. See Controls → Touch pads.
- Right-side power switch — physical on/off.
There are no menu buttons or screens beyond the matrix itself. Everything the firmware needs to communicate appears as lit pixels in known regions of the 16×16 area, explained in The matrix.
Internals
- Microcontroller: Teensy 4.1 plus the Teensy Audio Shield.
- Memory: 16 MB PSRAM (used for sample voices and the preview buffer) + up to 64 GB Micro SD.
- Audio: 44.1 kHz, 16-bit, stereo output. Mono input recording.
- Battery: optional internal LiPo (if installed). Estimated percentage shown under ETC → BATT — accurate enough for "is this enough for the set?" decisions.
- Speaker: small internal driver; switchable under VOL → SPKR.
- Internal mic + Mic-in jack: a built-in capsule for hands-free sampling, plus a dedicated 6.35 mm Mic-in jack on the bottom edge for an external microphone. Pick which one is active under REC → INPT; gain lives under REC → MIC.
- Expansion header J11 (I2SC_3V): onboard JST PH 1×05. Among other signals, the middle/right pins expose Teensy pin 31 and GND for a handmade analog clock / trigger cable (see MIDI → PPQN).
SD card setup
Two ways to get files onto the card: prepare it once with a computer and card reader (below), or transfer while the card stays in TŒRN via Menu → ETC → SD and sdtool.tyng.app.
SD tool (card stays in the unit)
Open Menu → ETC → SD on the device (the file server is only active while that page is open — the screen shows WAIT, then OK when a host connects). On a computer, open https://sdtool.tyng.app in Chrome or Edge, click Connect, and pick the Teensy serial port. Browse folders, upload WAVs (the site converts to 44.1 kHz mono 16-bit), download, rename, or delete. You can drop multiple files, whole folders (subfolders kept), or a .zip (extracted in the browser into the current SD folder).
Download default content (card reader)
The default folder layout, sample packs, and starter settings are available from the TŒRN Sample converter (audioconvert.tyng.app). Open the SD CARD section and download SD-CARD-CONTENT.zip. Extract the ZIP and copy all files and folders to the root of your microSD card (not inside a subfolder). Full instructions are on that page.
Recommended card
- SanDisk Ultra microSD (grey label)
- Speed class: UHS-I (Class 10)
- Capacity: up to 64 GB
- Use a genuine card from a trusted retailer — counterfeits often cause read errors or missing samples.
How to format
- Insert the microSD card into your computer with a card reader (not the TŒRN unit).
- Download and run the SD Memory Card Formatter from the SD Association.
- Select your card, leave Format type on Quick format, and click Format. Cards up to 32 GB are formatted as FAT32; 64 GB cards use exFAT — both work with TŒRN.
- Extract SD-CARD-CONTENT.zip and copy all files and folders to the root of the card (not inside a subfolder).
- Eject the card safely, insert it into TŒRN, and power on.
If the sample browser does not reflect new card content after power-up or after using the SD tool, run ETC → RSET → SD to rescan.
Colour scheme
Bright pixels follow the main voice colours below; idle / off pixels use a dim "base" tint of the same hue so empty rows stay readable but quiet. You can switch to alternate palettes (or a custom one from the card) under ETC → COLR.