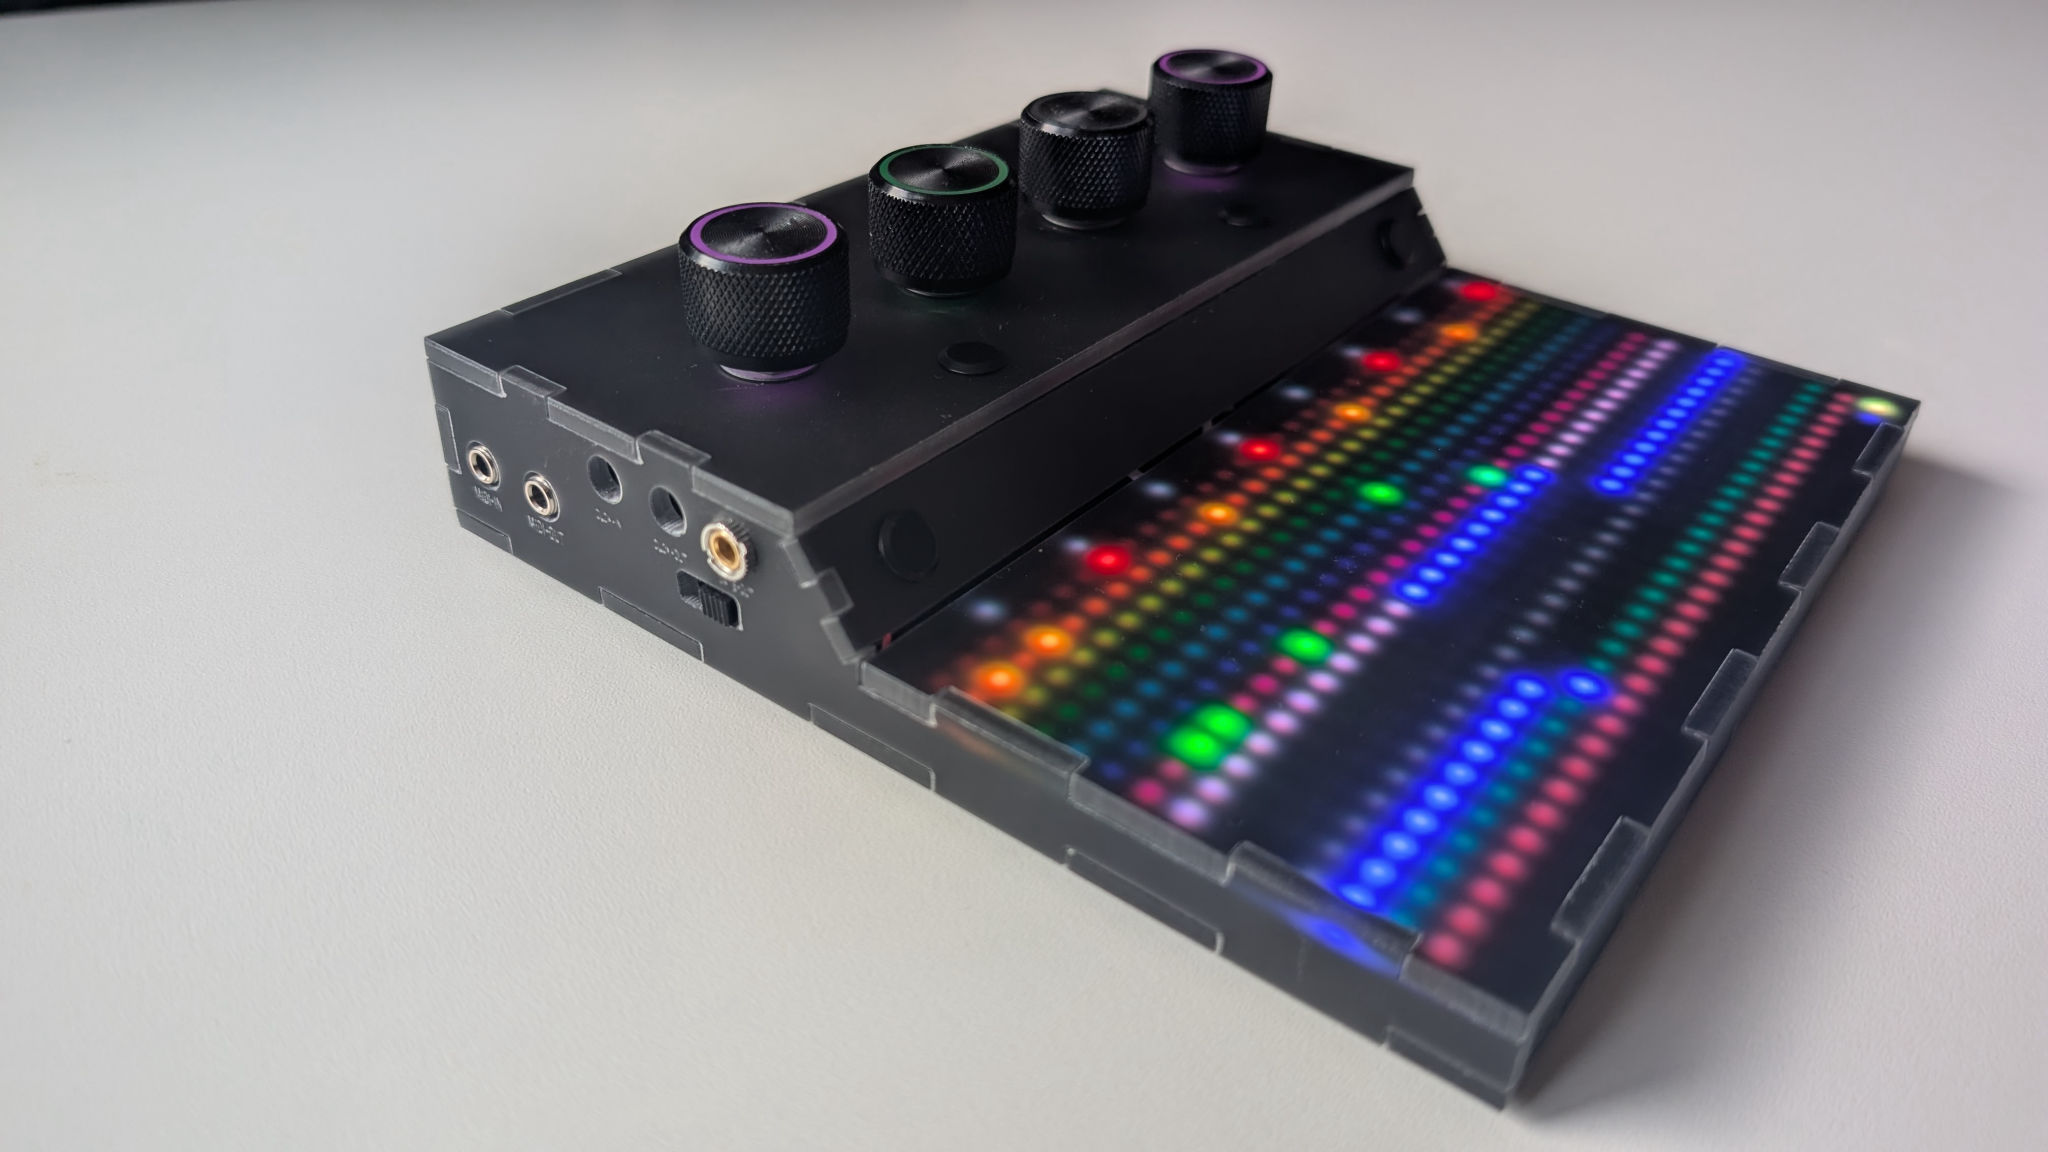
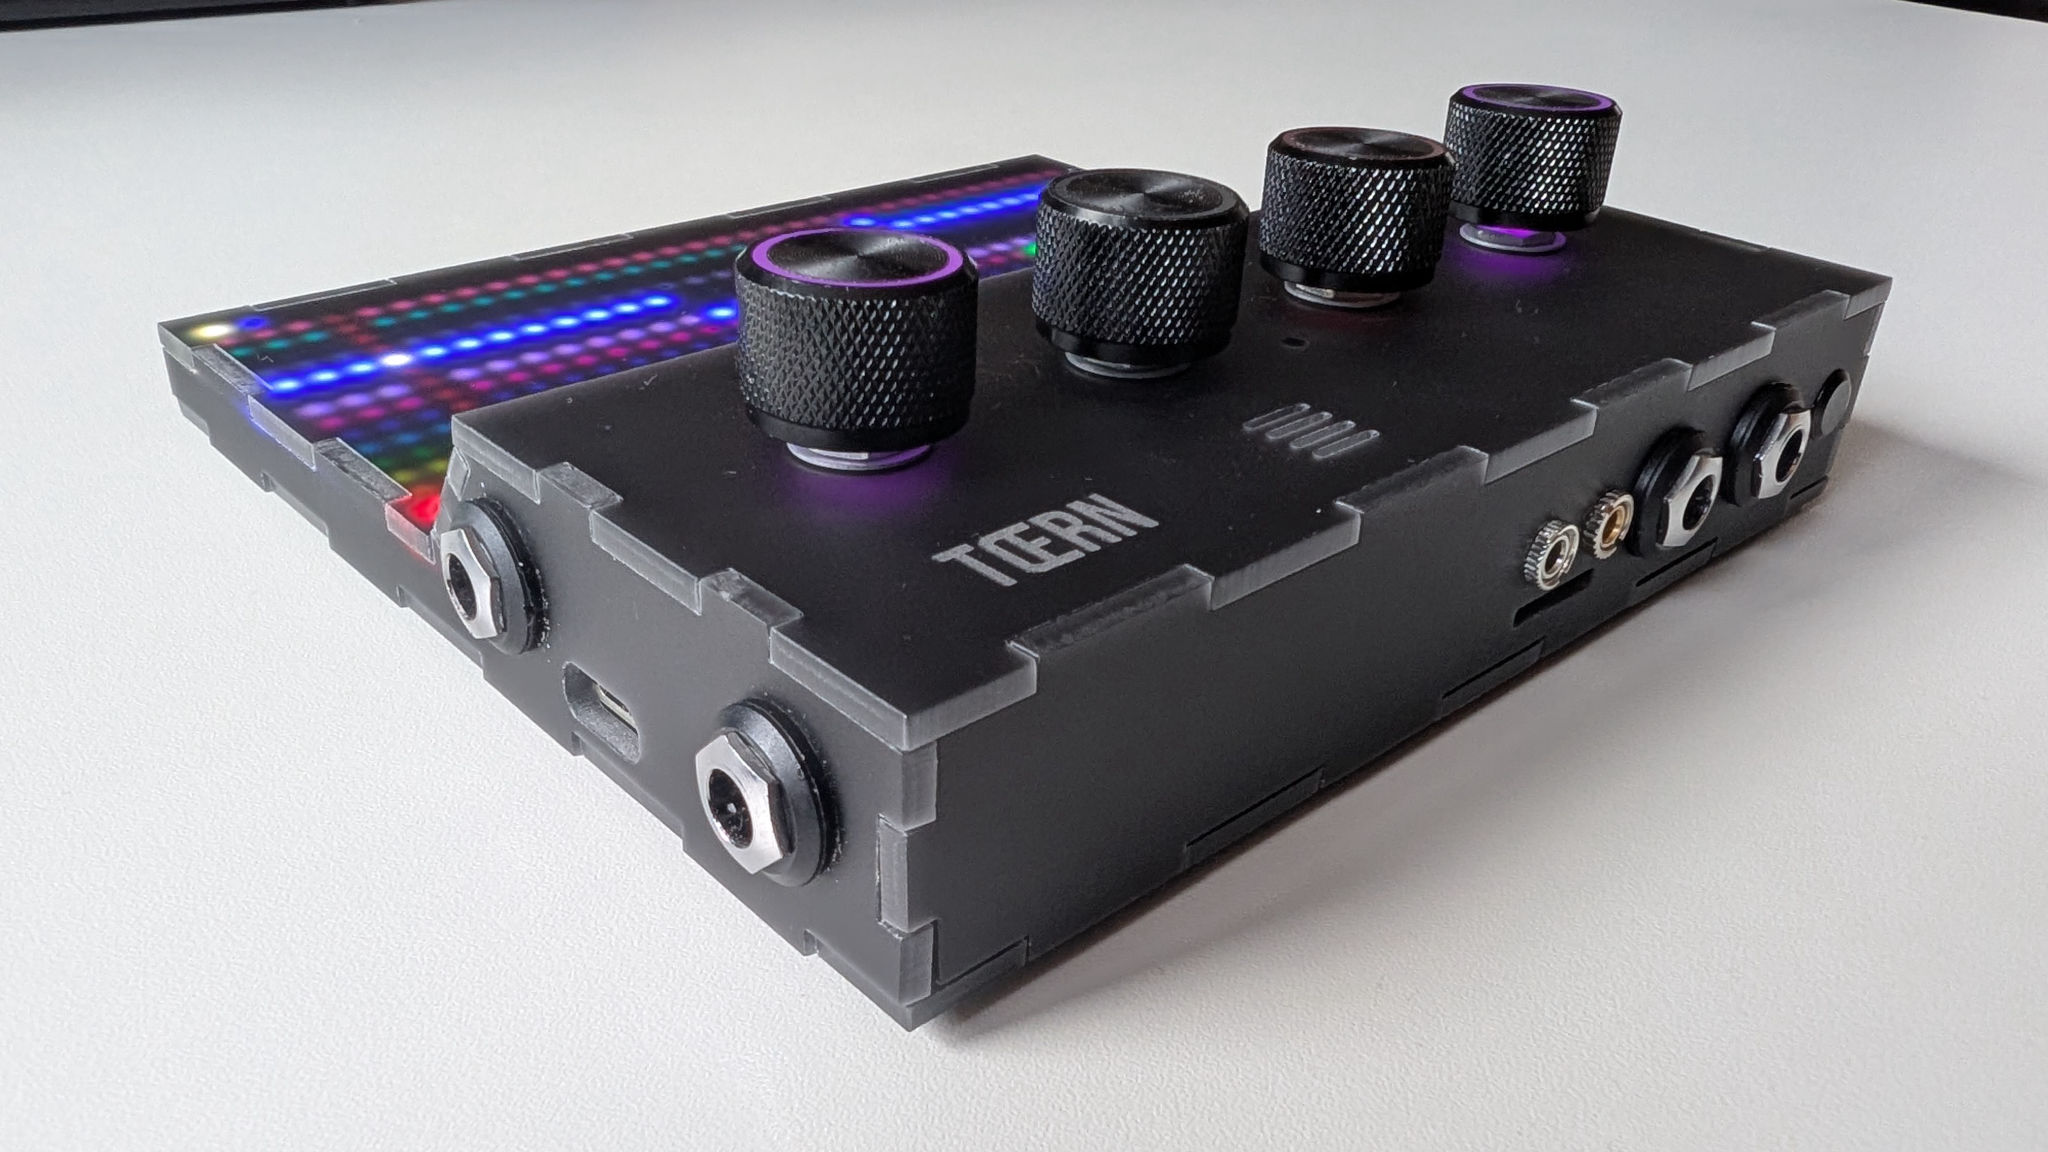
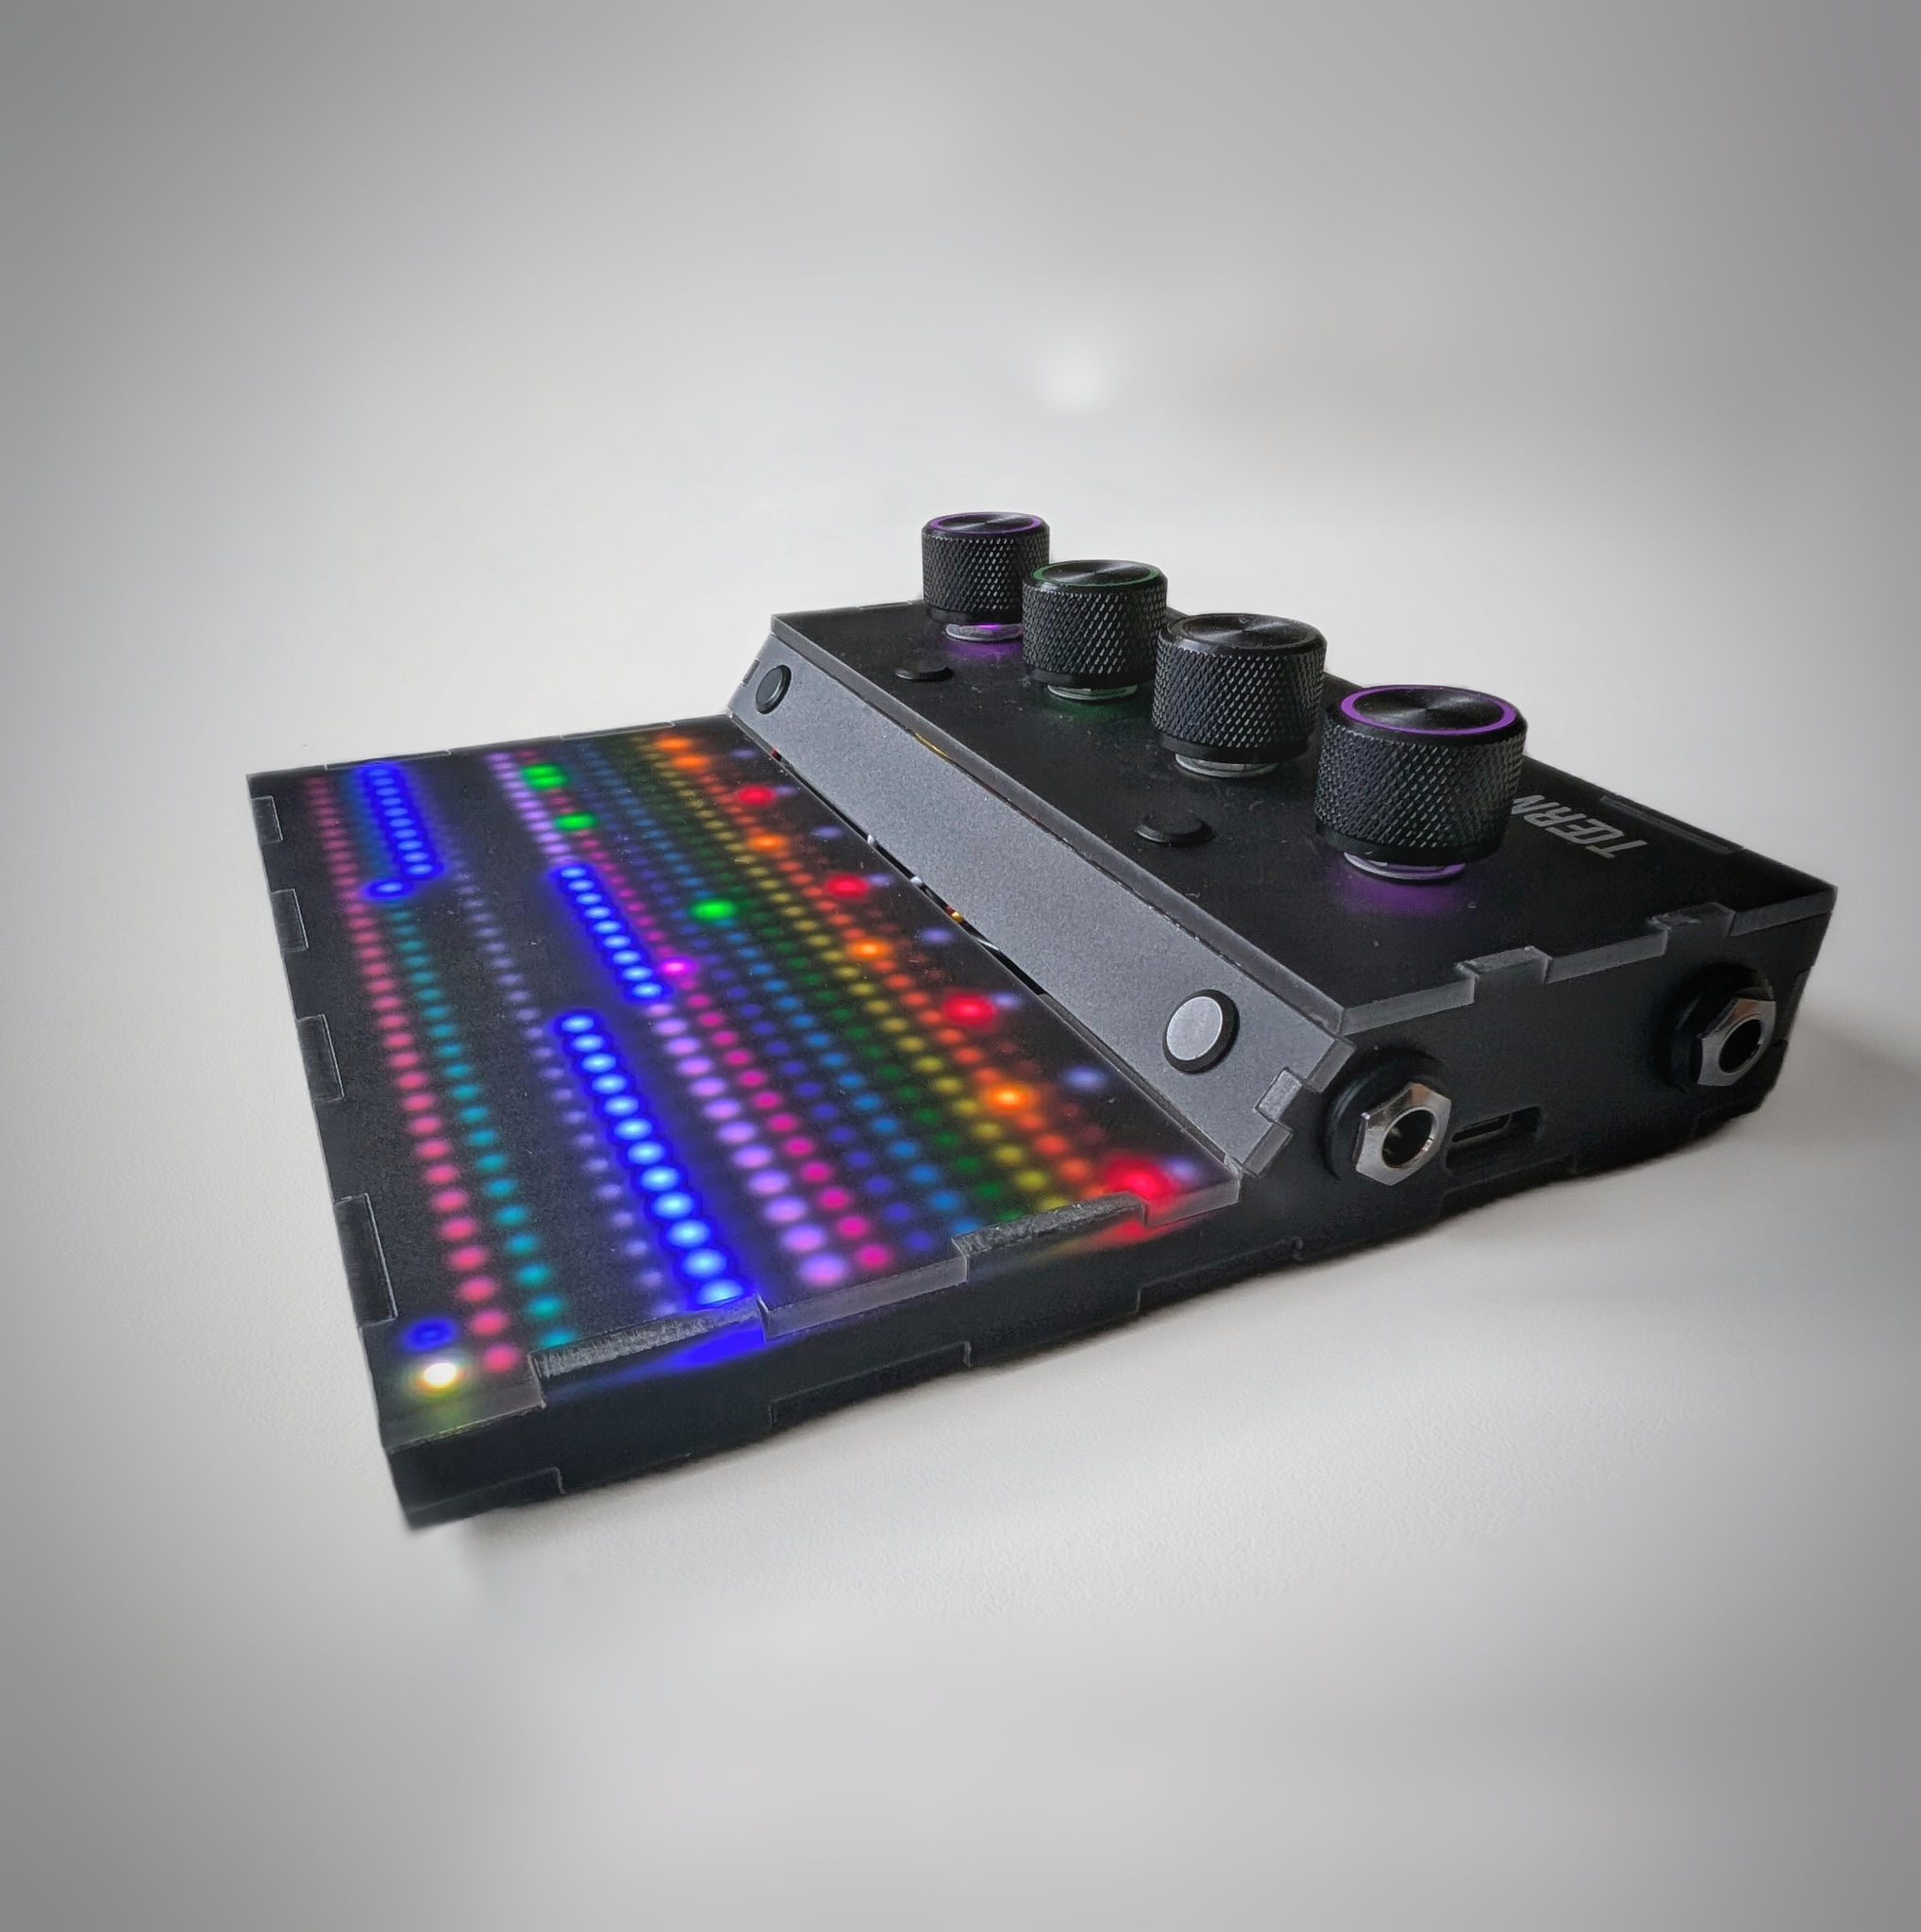
Hand holding TŒRN with the LED grid lit Hand holding TŒRN with the LED grid lit

TŒRN

by warft_labs

STANDALONE PORTABLE GROOVEBOX
SEQUENCER SAMPLER SYNTH
OPEN SOURCE CREATIVE PLATFORM
STANDALONE /// POWERFUL /// FUN /// PLAYABLE /// PORTABLE /// ARDUINO BASED /// 32X16 RGB GRID /// TEENSY 4.1 /// GROOVEBOX /// BATTERY READY /// EXPRESSIVE ///
LOVABLE /// SMALL /// COLORFUL /// BEGINNER-FRIENDLY /// CUTE /// EXTENDABLE /// MIDI COMPATIBLE /// LOOPER /// SURPRISING /// LIGHTWEIGHT /// INEXPENSIVE ///
// ABOUT

ABOUT

Hi, I'm Jan aka warft_labs - a musician and maker based in Hamburg. TŒRN started as a personal itch: I wanted a sequencer and sampler that feels like an instrument first, and a computer last - less buttons, less screen, less cables and less studio-feeling. Over the last years I’ve been prototyping, breaking, rebuilding, and testing it until it became something I genuinely love to play.

TŒRN is small-batch and still evolving. If you jump in now, you're joining early: you’ll find a few rough edges, but also a project with heart, openness, and lots of room to grow. If you like building, tweaking, or adding features, I’d love your help - feel free to contribute.

TŒRN is a standalone, open-source live performance sequencer - ready to operate on battery. Built to be played in motion - not prepared in advance.

It’s also a creative platform for your own ideas. The PCB brings sound, MIDI, light, touch, storage, and control together on one board, giving you a head start on fast prototypes. Build an interactive art installation, a theater cue player, a backing-track player, a fruit-touch instrument, or your own MIDI and lighting controller.

Tinker, build, and make it yours. Add sensors, switches, and faders; connect compatible I²C devices or another Arduino or microcontroller. Write your own behavior, build your own enclosure, and turn everyday objects into interfaces. The connector docs and source files are there to help you get started.

No laptop. No DAW. No preparation freeze. Build patterns. Break them. Save them. Keep playing. Everything happens while the clock is running. Patterns and sounds evolve inside the performance, not before it.

Start with the first beat guide, or explore the simulator. Its controls illustrate the workflow; browser sound and timing are approximate.

Try the browser simulator

TŒRN live setup
// System Capabilities

Key Features

FORWARD ENGINEERED

A groovebox might be the heart of your next project

AI slop is terrible. “Vibe-coding” and hacking firmware are a sport of their own these days. But AI can also help you build new features and make something great — even if you are new to Arduino.

TŒRN does not ask you to hack the firmware. It invites you to play with it: change what you need, add what is missing. Docs and skills are already there for you or an AI to use, so you do not need deep internals knowledge. If you already write firmware, the Arduino source is documented and ready to extend.

Later, TŒRN should have its own workflow for this: tell it what you want, and let the AI write and flash the firmware to your device.

GRID

The grid is the instrument

Draw your music with four knobs. The LED grid isn't just for sequencing — it's a retro-futuristic canvas for modulation and performance. Each LED can display pattern data, modulation values, effects states, and more, creating a visual representation of your music in real time. Time moves from left to right, voices stack vertically, and the pattern stays visible as you turn the knobs.

Draw steps directly onto the grid, switch pages, edit parameters and perform without moving between a screen and a separate controller. Custom color schemes let you make the interface your own.

PLAY

Build while it plays

TŒRN is designed around the running clock. Mute, solo and transpose voices without stopping. Change samples, load or save a pattern, or switch an entire sample pack while the sequence keeps moving.

Probability and conditional triggers add controlled variation. A 64-slot page chain turns individual pages into complete arrangements.

Voice mode gives each voice its own pattern length. A voice loops the pages that contain its notes, including pitches on other rows, while every other voice keeps its own cycle.

There is no separate preparation mode. Building, editing and performing are the same workflow.

SAMPLE

Sample anything

Load WAV files from MicroSD or record directly into one of the eight sample voices. Browse samples by folder and hear them before loading.

Every sample voice holds up to 12 seconds of 44.1 kHz, 16-bit mono audio. Trim the start and end points, reverse the sample, set its level, shape its envelope, filter it or reduce its bit depth and sample rate.

TIME stretches or shortens a sample without the usual pitch shift from speeding it up — useful for fitting hits and loops to the groove.

RECORD

Record without stopping

Capture a microphone, instrument or line-level source while the clock is running, then sequence the recording immediately.

Use hold-to-record for hands-on sampling or one-shot mode for a defined take. Input monitoring lets you hear the source throughout the recording process, with separate control over input and output levels.

SYNTHS

One poly synth. Two mono synths.

Eight sample voices, one three-voice poly synth and two mono synths. The remaining grid rows are unassigned or reserved for navigation rather than additional sound voices.

The polyphonic synth provides three voices with three oscillators per voice. It includes an ADSR envelope, filter envelope, waveform selection, tuning in cents and semitones, pan and a shared reverb send.

Two monophonic synths provide two oscillators each, plus their own LFO and arpeggiator. Great for bass lines, leads, drones and repeating melodic structures.

EFFECTS

Shape every voice

Sound parameters remain accessible while the sequence runs. Adjust envelopes, filters, independent time-stretch and bit reduction as part of the performance instead of treating them as a separate production stage.

Each voice has its own ADSR envelope. Filters provide low-pass, high-pass and band-pass modes with resonance. The bitcrusher controls bit depth and sample-rate reduction. TIME stretches around the current pitch.

Reverb is shared through individual sends, allowing selected voices to sit in the same space without processing the entire mix equally.

CLOCK

Clock your setup

TŒRN can lead a setup or follow one.

MIDI input and output carry clock, notes or both over 3.5 mm TRS Type A connections. Use the internal BPM clock, sync TŒRN to an external MIDI clock or send its timing to other instruments.

A dedicated analog PPQN pulse output follows the same clock (1–32 PPQN). JST headers also bring out analog clock in (3–5 V), buffered 5 V clock out, and a 5 V sidechain / gate out — digital pulses only, no CV. USB-C carries power, serial data and USB audio output. Use the TRS ports for MIDI notes, clock and transport.

AUDIO

Audio in and out

TŒRN’s audio system is built around the SGTL5000 codec, providing onboard sampling, monitoring and playback.

Connect headphones, a mixer, an external microphone or a line-level source using full-size 6.35 mm connections. A built-in microphone is available whenever you want to capture something without setting up additional equipment.

OPEN

Open by design

TŒRN is an instrument you can play immediately and a platform you can continue to change.

It runs on a Teensy 4.1 with Arduino-based firmware. The firmware is released under the MIT License. Hardware design files are published under CC BY-NC.

Expansion headers expose 3.3 V, 5 V, ground, WS2812 and spare I/O, plus dedicated clock-in, 5 V clock-out and sidechain/gate JSTs. Add lights, switches, triggers, clocks, gates or something that does not exist yet.

01 / ONE BOARD. YOUR IDEAS.

A groovebox.
A starting point
for something else.

TŒRN is a groovebox, but it can be so much more than an instrument. Its Teensy 4.1 runs at 816 MHz in the current firmware build, with JST expansion headers exposing 17 GPIO pins and easy access to onboard 3.3 V and 5 V power.

Make it the heart of an interactive installation, a companion in your live setup, or an instrument nobody has imagined yet. Your project. Your code. Your way.

What will you make?
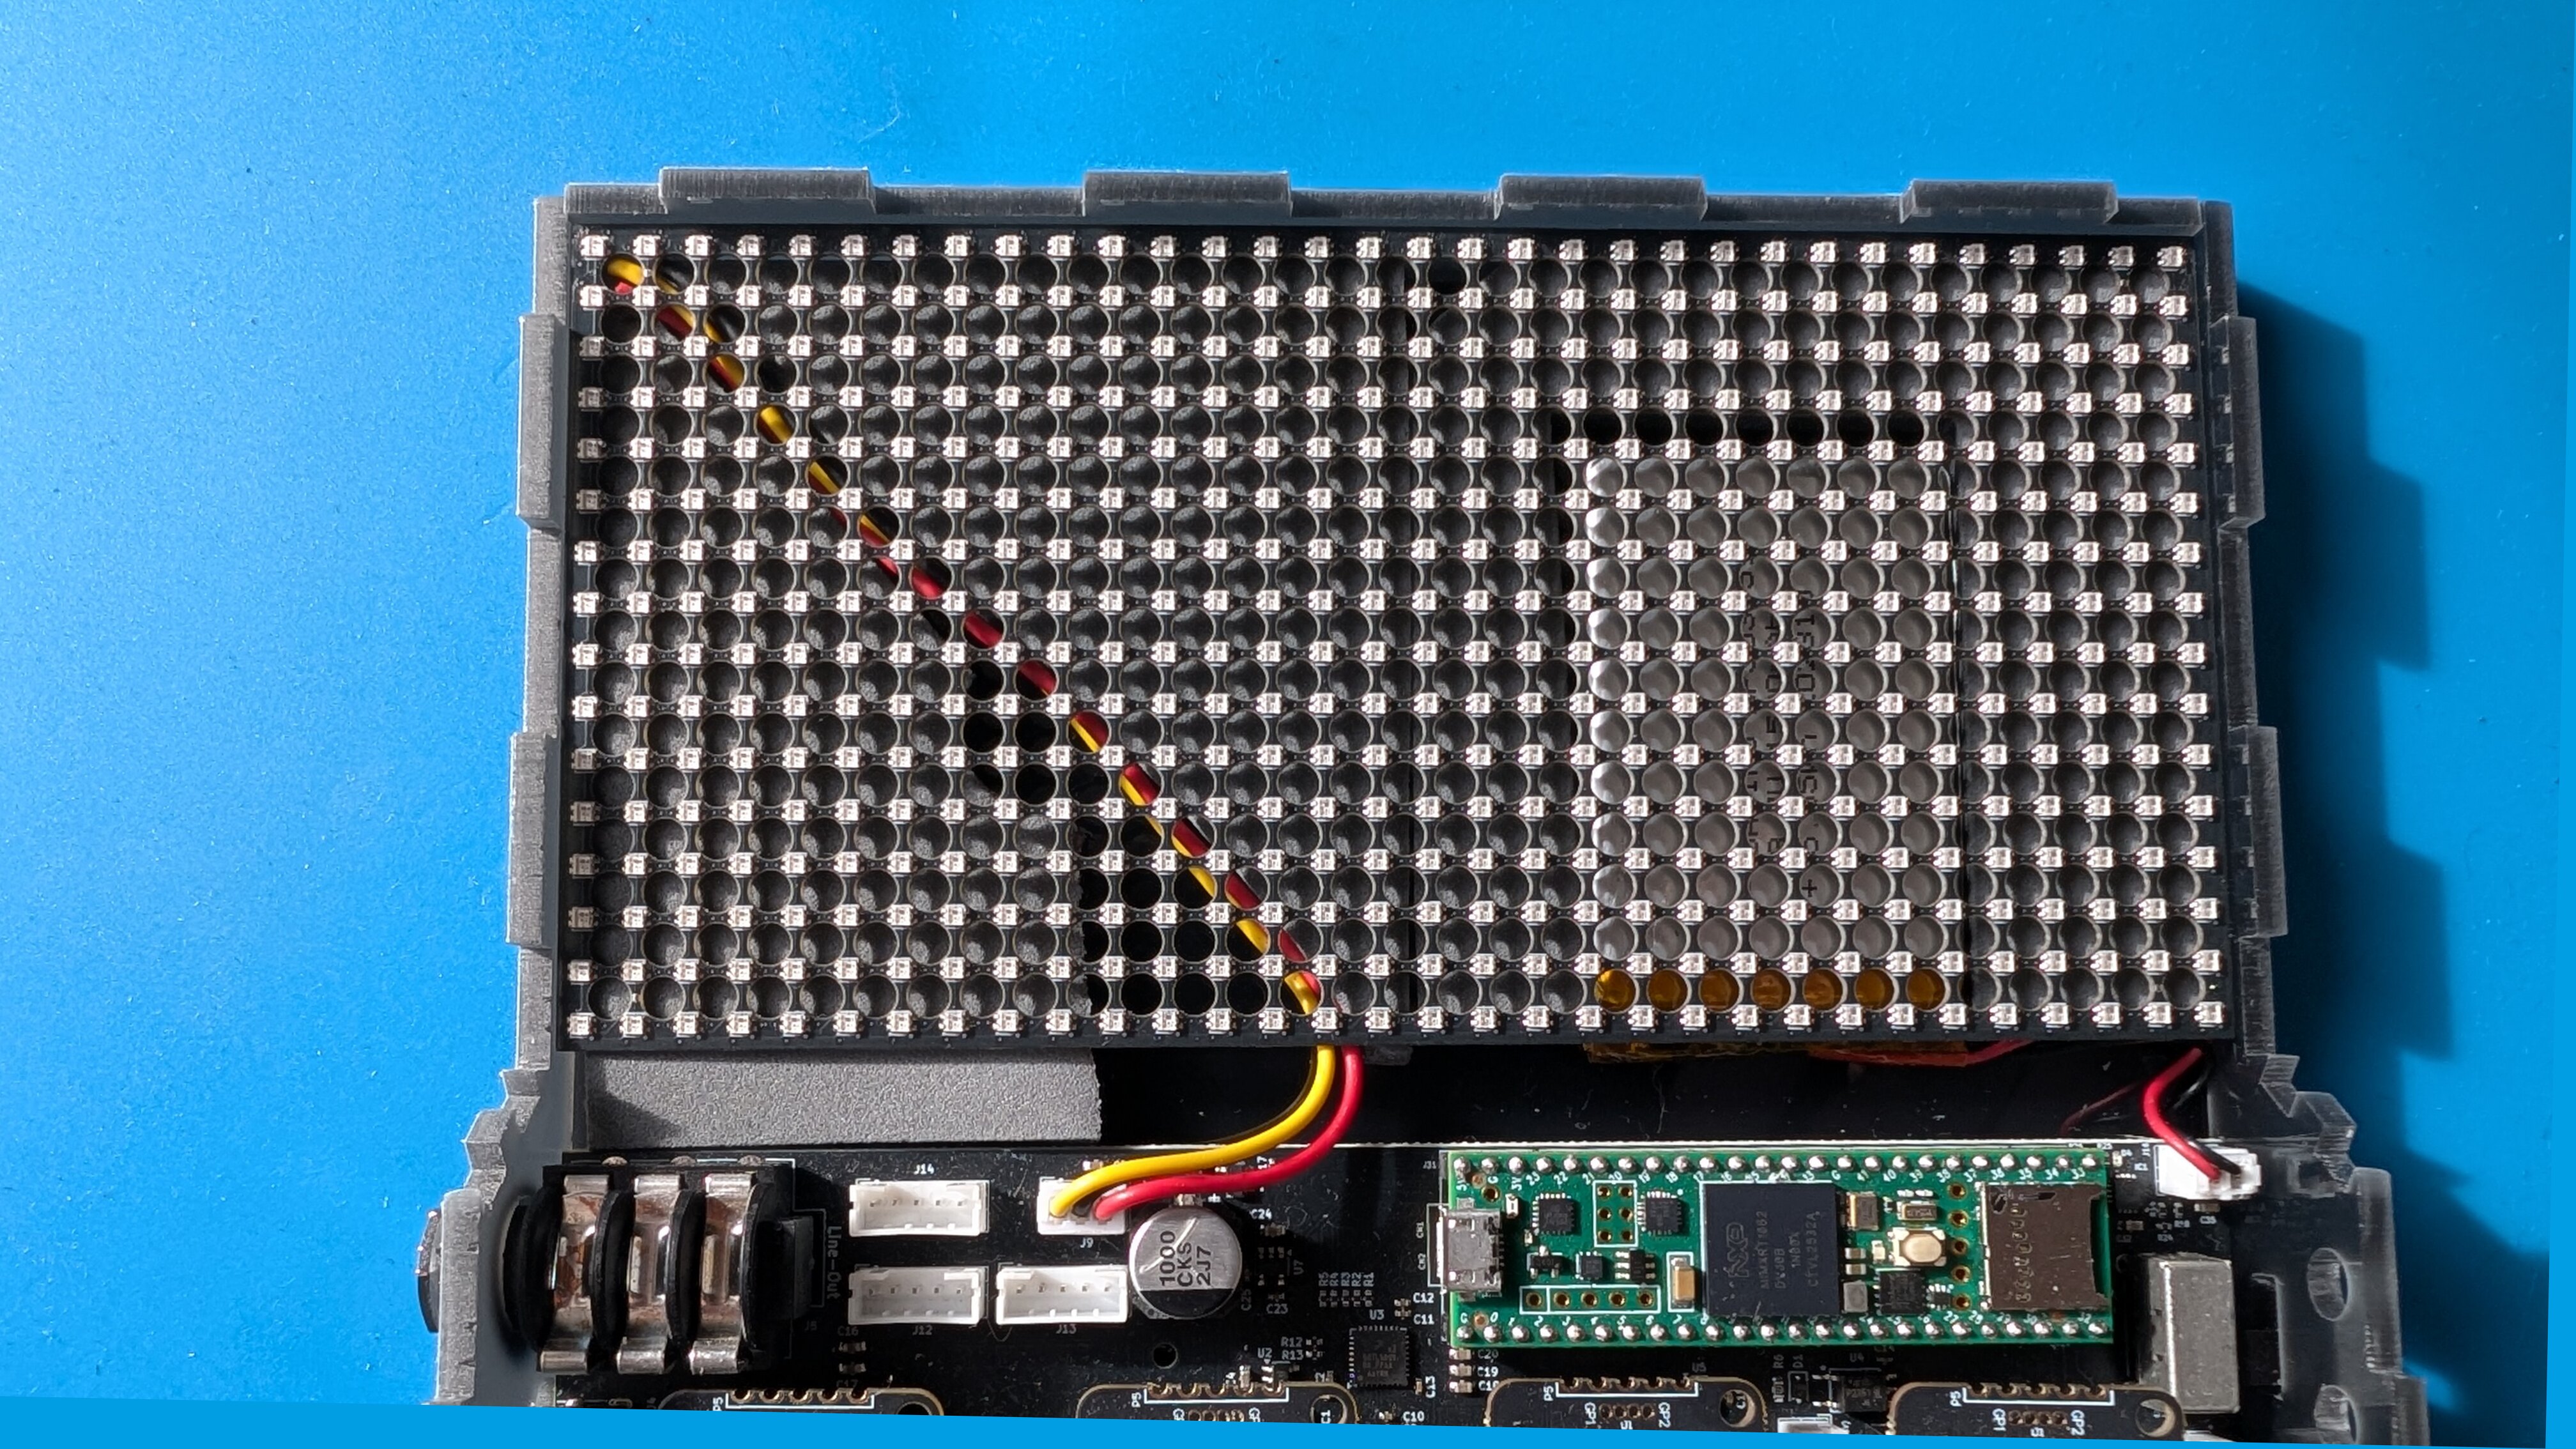
The TŒRN PCB with audio connections, expansion headers, and microcontroller sockets
THE FOUNDATIONYOU DECIDE WHAT HAPPENS NEXT
AUDIOMIDITOUCHLIGHTI²CANALOG + DIGITAL I/OsSD CARDUSB-CJSTWS2812BATTERY CHARGERINTERNAL MICAMPLIFIER · PAM8403 · UP TO 3 W

Sound, MIDI, light, touch, storage, and control on one board. Start with the instrument, or use the PCB as the foundation for your own project.

The PCB already has the building blocks you might need.
Less time assembling the basics.
More time making your idea work.

02 / PROJECTS TO BUILD

On stage.
In a gallery.
On your kitchen table.

One platform, many possible projects. Bring your own idea, add the interfaces it needs, and make the firmware your own.

Built with open-source, Arduino-compatible libraries and familiar tools. No reverse engineering or firmware hacking needed—start with the source, use the libraries you already know, and build from there.

A cue for the next scene. A sculpture that reacts to visitors. An instrument made from fruit. Choose a starting point below to explore what you could build.

CUE → SOUND

Your next performance.

Build a band backing-track player, a theater cue system, or a portable sound-effects box. Record MIDI ideas and keep instruments moving together with MIDI clock.

03 / MAKE IT YOURS

Add a sensor.
Move a fader.
IF YOU CAN THINK IT, YOU CAN ADD IT.

Connect sensors, switches, faders, and compatible I²C devices. Add another Arduino or microcontroller. Write your own behavior, build a different enclosure, or turn an everyday object into an interface.

Tinker-friendly. DIY-friendly.
A head start for your next prototype.

// Technical

Specifications

TŒRN

No laptop. No freeze.

Standalone. Battery ready. Built to move. Extendable and accessible. Add what you need - use it your way.

// SPECIFICATIONS

HARDWARE

Build it yourself

Build a personal rev H unit from the open hardware files. Fit a Teensy, four DuPPa encoders, the matrix and a case. A finished TŒRN ordered from the shop arrives ready to play.

01 Fabricate the PCB yourself

Only if you did not buy the pre-assembled circuit board (PCB only) beside this step. That board is populated and nothing else: you still add the Teensy, encoders and the rest.

Order the 4-layer, 1.6 mm rev H PCB with the matching Gerbers, production BOM and CPL from the production package. Check every component match in the assembly quote before paying.

Pre-order or arrange sourcing for SGTL5000XNBA3 (C5196742), SJ1-3533 (C4991776), EG2219 (C3664594), EEE-FK1C102SV (C5686929), DM3BT-DSF-PEJS (C597972) and TLP2361 (C107626) before PCB assembly. The pre-order BOM gives quantities and sourcing routes. Use JLCPCB Parts Pre-order or an approved sourcing route, and verify the component matches in your quote.

JLCPCB assembles the carrier components, including the pogo pins, audio/MIDI jacks, encoder sockets, JST-PH headers, switch and microphone. CN1/CN2 pogo pins are included in the production BOM: C5157282, quantity 2. The BOM directory separates the assembled carrier parts from the sockets, modules and cables you fit yourself.

Don’t want to fabricate the PCB yourself? Buy a pre-assembled circuit board (PCB only) here
99€
Pre-assembled circuit board (PCB only). No Teensy, encoders, panel or case. Price includes EU VAT · plus shipping.

Shipping

Thank you for your PCB order.

Your payment was successful. This order is the pre-assembled circuit board (PCB only).

Secure checkout via PayPal (PayPal account or credit / debit card). Widerrufsbelehrung · Vertrag widerrufen

02 Add the Teensy
  1. Solder two compatible 8 MB PSRAM chips to the Teensy 4.1 underside for 16 MB total. Align pin 1 using PJRC’s placement photos, inspect for bridges and run the linked memory test. Confirm 16 MB is detected and passes before fitting the module.
  2. Solder two 1×24 male headers, 2.54 mm pitch, along the Teensy edges. Keep them straight. Fit four 1×12 female carrier sockets, 3M 929870-01-12-RA (DigiKey), at J28–J31. CN1/CN2 are already fitted by JLCPCB; check they contact the Teensy USB-device D−/D+ pads and allow clearance for the PSRAM.
  3. Inspect the JLCPCB-assembled carrier, including the jacks, JST-PH headers, encoder sockets, power switch, microphone and pogo pins. Match the assembled parts to the schematic before powering up.
  4. Bridge JP1 center to VYS for normal USB/battery operation. Center to VBUS is the USB-only option. Bridge one gap only. Bridging both joins raw USB power to the charger output. Check VIN/VUSB isolation if also plugging into the Teensy’s own USB socket while the carrier supplies VIN.
03 Add the DuPPa encoders

Solder each DuPPa V2.1 RGB encoder and its two 1×5 headers. Set the four module addresses from left to right to 0x01, 0x41, 0x20, 0x61: close A0; A6+A0; A5; A6+A5+A0 respectively. Leave other address jumpers open. Carrier encoder header pins are 1 GND, 2 +5 V, 3 SDA, 4 SCL, 5 INT; match module labels before seating.

04 Wire the matrix, clocks and speaker

Use the standard touchpads with inlay pieces fitted into the touchpad assembly. The build needs one 5-pin touch cable, four 2-pin speaker/clock-jack cables, and one 3-pin LED-panel cable, JST-PH 2.00 mm. Pin numbers are PCB pins, not wire colours.

ConnectionWire it this way
Matrix · J91 → DIN, 2 → GND, 3 → +5 V. One 32×16 panel; firmware LED mode 2 addresses its 512 LEDs.
Clock out · J251 → TS jack tip, 2 → sleeve/GND. Buffered 5 V output (Teensy 37).
Clock in · J261 → TS tip, 2 → sleeve/GND. Buffered 3–5 V input (Teensy 38).
Sidechain out · J271 → TS tip, 2 → sleeve/GND. Buffered 5 V voice trigger (Teensy 28).
Speaker · J101 → ROUT−, 2 → ROUT+. Neither wire goes to GND.
Touch · J13Pin 1 touch 1 (GPIO 2), pin 3 menu (GPIO 3), pin 2 touch3 (GPIO 4), pin 4 audition (GPIO 6), pin 5 FN (GPIO 39).
Battery · J161 → GND, 2 → VBAT. Check the LiPo plug polarity first.
05 Cut the case
  1. Choose 32_16.dxf plus COMMON.dxf for the standard desktop housing; 16_16.dxf is the smaller optional build. For the modular panel choose modular_2parts.dxf or its two separate base/front files. Import in millimetres at 1:1; do not cut both the combined file and its separate copies. The modular base is 182.5 × 128.5 mm and the front is 172 × 86 mm.
  2. Separate SCHNITT (cut) from GRAVUR (engrave). Exclude reference clearance guides. Convert text to outlines if your laser software cannot use Space Grotesk Bold.
  3. Start with a 0.125 mm offset into the waste: outside the outer perimeter and inside holes/cutouts. Software asking for full kerf width needs 0.250 mm for that offset. Check the preview and apply compensation only once.
  4. Cut a fit coupon in the actual laser-safe acrylic first. Adjust kerf to the machine/material and confirm sheet thickness against your stack. The modular illustration uses a 2 mm base, 8 mm LED and 2 mm front; verify the real clearances before ordering sheets.
  5. Engrave first, cut holes next, outer profiles last. Dry-fit everything and check the panel, PCB and LED clearances before final assembly. Mount the PCB flat underside toward the panel.

Follow the modular laser notes for the mounting orientation. The older browser case generator uses an older board template; verify rev H holes before cutting from it.

06 Power on

Leave the battery, Teensy and matrix disconnected for the first carrier check. With JP1 bridged and the switch on, check the 5 V, 3.3 V and 1.8 V rails. Power off, fit the tested Teensy, then reconnect and check again.

Build with pio run -d platformio from the repository root, or use the flashing instructions. The firmware uses USB Serial + MIDI + Audio. Add the microSD and matrix with power off, test the four encoders and headphone audio, then enable the optional speaker in VOL → SPKR. Connect the battery after the USB-powered checks pass.

Try the handbook’s first beat. For the display Demo, open ETC → INFO and press touch3 / BUTTON_C; press and release Touch 1 / BUTTON_A to return.

Parts list, BOMs and drawings

Full assembly guide Purchasing BOMs Housing DXFs

QtyPartWhat to check
1Assembled rev H PCBSecure SGTL5000XNBA3 and all unavailable assembly parts before ordering.
1 + 2Teensy 4.1 + 8 MB PSRAM chips16 MB total; two 1×24 male headers if the Teensy has no pins.
4 setsDuPPa I2C Encoder V2.1, RGB encoder, knobTwo 1×5 male headers each; check which accessories the bundle includes.
132×16 RGB LED panelStandard 512-LED display; J9 3-pin mating cable. 16×16 is optional.
5 + 1 setTouchpads + inlayFit the inlay into the touchpad assembly. Four grounded buttons are the external-panel alternative.
41×12 Teensy carrier sockets3M 929870-01-12-RA, DigiKey; solder at J28–J31.
3Clock/sidechain TS panel jacks (Amazon source)Match panel holes; solder each jack to a 2-pin cable from the four-lead total below.
1Speaker (optional)Solder speaker leads to a JST-PH 2.00 mm 2-pin mating cable for J10. Neither terminal is GND.
1JST-PH 5-pin cable2.00 mm pitch; five touchpads on J13.
4JST-PH 2-pin cables2.00 mm pitch; one for the speaker and three for clock/sidechain jacks.
1JST-PH 3-pin cable2.00 mm pitch; LED panel on J9.
1Single-cell LiPo (optional)JST-PH plug; verify polarity and case fit.
1 eachmicroSD + USB-C data cable32 GB FAT32 or 64 GB exFAT; load the sample folders onto the card.
1 setLaser-safe acrylicMatch the housing and measured stack.

Hardware files are CC BY-NC 4.0 for personal/non-commercial builds. Commercial hardware sales require written permission; see the license.

Open TŒRN with the LED matrix and circuit board

Open & Hackable.

Firmware is MIT. Hardware design files are CC BY-NC. The handbook is how you play it.

// OPEN SOURCE

Contribute

TŒRN is open source. Use the firmware, and hardware files; build - and share what you make. PCB, source code, and docs are on GitHub.

See It In Action

View on Instagram
// MAKE IT YOURS

Buy TŒRN

  • One TŒRN unit - sequencer, sampler and synth groovebox
  • 17 × 17 × 5 cm, about 480 g
  • DIY kit, partially assembled
  • 32×16 layout. If you need a 16×16, contact me via the imprint.
  • Standalone - no laptop or DAW needed to play
  • Powered via USB-C, also battery-ready — has to be ordered from 3rd party

    Battery: 503759 3.7V 1500 mAh, PCM, JST PH2.0-2P Plug — example (Amazon). Max thickness 5 mm, up to 3000 mAh should work. Cut the foam so the cell fits. Plug pin 2 is positive (VBAT).

    Power Supply: any suitable USB-C power supply with more than 2A should be fine, e.g. IKEA SJÖSS — IKEA SJÖSS

  • When it arrives, open the handbook and play the first beat
  • MicroSD card for samples is included
  • Unit and packaging. Shipping for Germany and EU is added at checkout.

TŒRN is a small-batch instrument from an independent maker, not a mass-produced product. It is tested, and it can still have rough edges. Firmware is MIT. Hardware design files are CC BY-NC.

449€
Price includes EU VAT · plus shipping

Built first, then shipped. About 5–10 weeks after your order.

Thank you for your order!

Your payment was successful. We have received your order. It is built first, then shipped, about 5–10 weeks after payment. A microSD card is included. While you wait, order a battery from the list on this page. When it arrives, start at the first beat.

Secure checkout via PayPal (PayPal account or credit / debit card). Widerrufsbelehrung · Vertrag widerrufen

Shipping

Shipped via DHL. Germany and EU shipping are added at checkout, on top of the unit price. The unit price does not include shipping.

Customs, Tax

EU: Total includes VAT (19%).

Other: Customs and/or import tax may apply upon import.

You may declare the revocation of your contractual statement in text form (e.g. letter, email) or by returning the merchandise within a period of two weeks. The revocation does not have to contain any reason. We will forward this revocation instruction to you again in text form. The revocation period commences the day following the receipt of merchandise and this revocation instruction in text form. The time-limit shall be deemed to be observed by the timely dispatch of the declaration of revocation or the return shipment.

The revocation is to be addressed to:

E-Mail: info@toern.live

Postal:

warft_labs
Schanzenstraße 35
20357 Hamburg
GERMANY

Personal data you provide for ordering are used for order processing and communication directly related to the order (such as invoice, shipment notification) only. This information is not shared with third parties and will be stored as long as required by law. When ordering through PayPal, your personal data are collected by PayPal and PayPal's privacy policy will apply, too.

// FAQ

Order & Shipping

When will my TŒRN ship?

Your TŒRN is built first, then shipped. That takes about 5–10 weeks after your order.

You’ll get production updates by email.

Can I cancel my order?

You may cancel your order for a full refund at any time before production begins.

Once production has started, cancellation may no longer be possible.

After delivery, the statutory 14-day right of withdrawal applies in accordance with EU consumer law.

To request a cancellation or withdrawal, please contact us at info@toern.live.

Is there a warranty?

Yes. All units are covered by a 2-year warranty in accordance with applicable EU law.

This warranty applies in addition to statutory consumer rights, including rights related to defects and non-conformity.

Where do you ship to?

Orders on this site ship only within the EU.

// THANK YOU

Standing on good work

TŒRN is a small instrument built on a lot of generous work by other people. None of this would exist without them, so here is where the credit belongs.

First and foremost: thank you to Paul Stoffregen and the PJRC crew. The Teensy 4.1 is the brain of every unit, and the Teensy Audio Library — Freeverb and all — is the reason it sounds like something you want to keep playing. The Teensy cores, WS2812Serial for the LED matrix, and LittleFS and SerialFlash for storage come from the same place. An enormous amount of TŒRN is really their work, carefully wrapped in a box with knobs.

An especially loud shoutout goes to Nic Newdigate, whose teensy-polyphony and teensy-variable-playback are the polyphonic heart of this instrument. And a warm thank you to signaturesounds.org for providing such awesome sounds and samples — a sampler is only as good as what you feed it.

Plenty of other projects are doing quiet, essential work in the background: the Arduino MIDI Library by FortySevenEffects keeps TŒRN in time with the rest of your studio, FastLED paints every pixel you see, Adafruit’s BusIO and seesaw libraries talk to the hardware, DuPPa’s ArduinoDuPPaLib drives the encoders, Adrian Freed’s FastTouch reads your fingertips, natnqweb’s Mapf does the maths nobody wants to write twice, Bill Greiman’s SdFat sits behind every sample you load and save, and Teensy Loader puts new firmware on your unit from the browser.

And thank you to the wider open-source audio community, for sharing the kind of knowledge that lets one person build a synth in the first place. Full credits and licenses live in the git repository.